Explore downtown Litchfield. This “pastcast” tour of the city shares the stories from twenty-eight properties, tracing Litchfield’s growth from a frontier town to a significant agricultural and commercial center.
These short documentaries provide a fascinating glimpse into our downtown and make an enjoyable and educational addition to any visit to the city. You can also download and print a walking tour brochure to learn more.
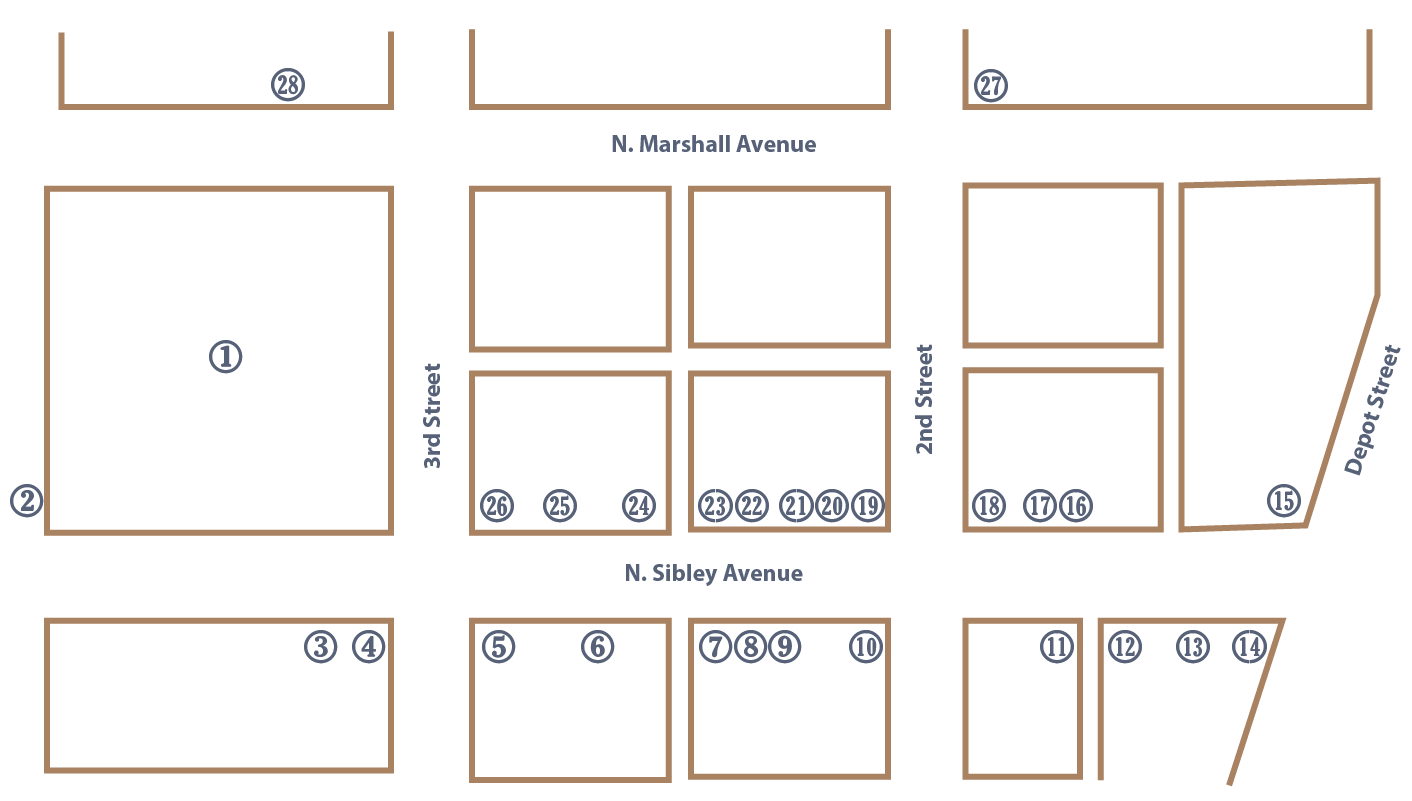
Downtown Litchfield: Stop 1: Central Park
Downtown Litchfield: Stop 2: Trinity Episcopal Church
Downtown Litchfield: Stop 3: Black & White Inn
Downtown Litchfield: Stop 4: Robertson Hospital
Downtown Litchfield: Stop 5: Stevens-Harris-Branham Block
Downtown Litchfield: Stop 6: Cairncross Block
Downtown Litchfield: Stop 7: Litchfield Independent
Downtown Litchfield: Stop 8: Palm Block
Dowtown Litchfield: Stop 9: Litchfield Ice Cream Company
Downtown Litchfield: Stop 10: First National Bank
Downtown Litchfield: Stop 11: Howard Block
Downtown Litchfield: Stop 12: Meeker County Bank
Downtown Litchfield: Stop 13: Meeker County Offices
Downtown Litchfield: Stop 14: Howard Hotel
Downtown Litchfield: Stop 15: Wells Store
Downtown Litchfield: Stop 16: Scarp's Cafe
Downtown Litchfield: Stop 17: Koerners' Meat Market
Downtown Litchfield: Stop 18: Brill's Drug Store
Downtown Litchfield: Stop 19: Brown's Block
Downtown Litchfield: Stop 20: U.S. Land Office
Downtown Litchfield: Stop 21: Hollywood Theatre
Downtown Litchfield: Stop 22: Deilke's Cleaners
Downtown Litchfield: Stop 23: Johns Hardware
Downtown Litchfield: Stop 24: Dart-Berens-Konsbrick Block
Downtown Litchfield: Stop 25: Dan's Eat Shop
Downtown Litchfield: Stop 26: Masonic Block
Downtown Litchfield: Stop 27: Opera House
Downtown Litchfield: Stop 28: G.A.R. Hall